This is a guide on how to set up your Development Environment (DE) to compile, run, and debug COSMOS.
Installing via Docker (Recommended)
We recommend installing COSMOS via Docker. By using Docker containers you will automatically resolve all the COSMOS dependencies.
Step 1: Install Prerequisites
For Windows Users
For Windows users, install Windows Subsystem for Linux first:
- Open the Start menu, type "PowerShell", then right-click PowerShell and select "Run as administrator".
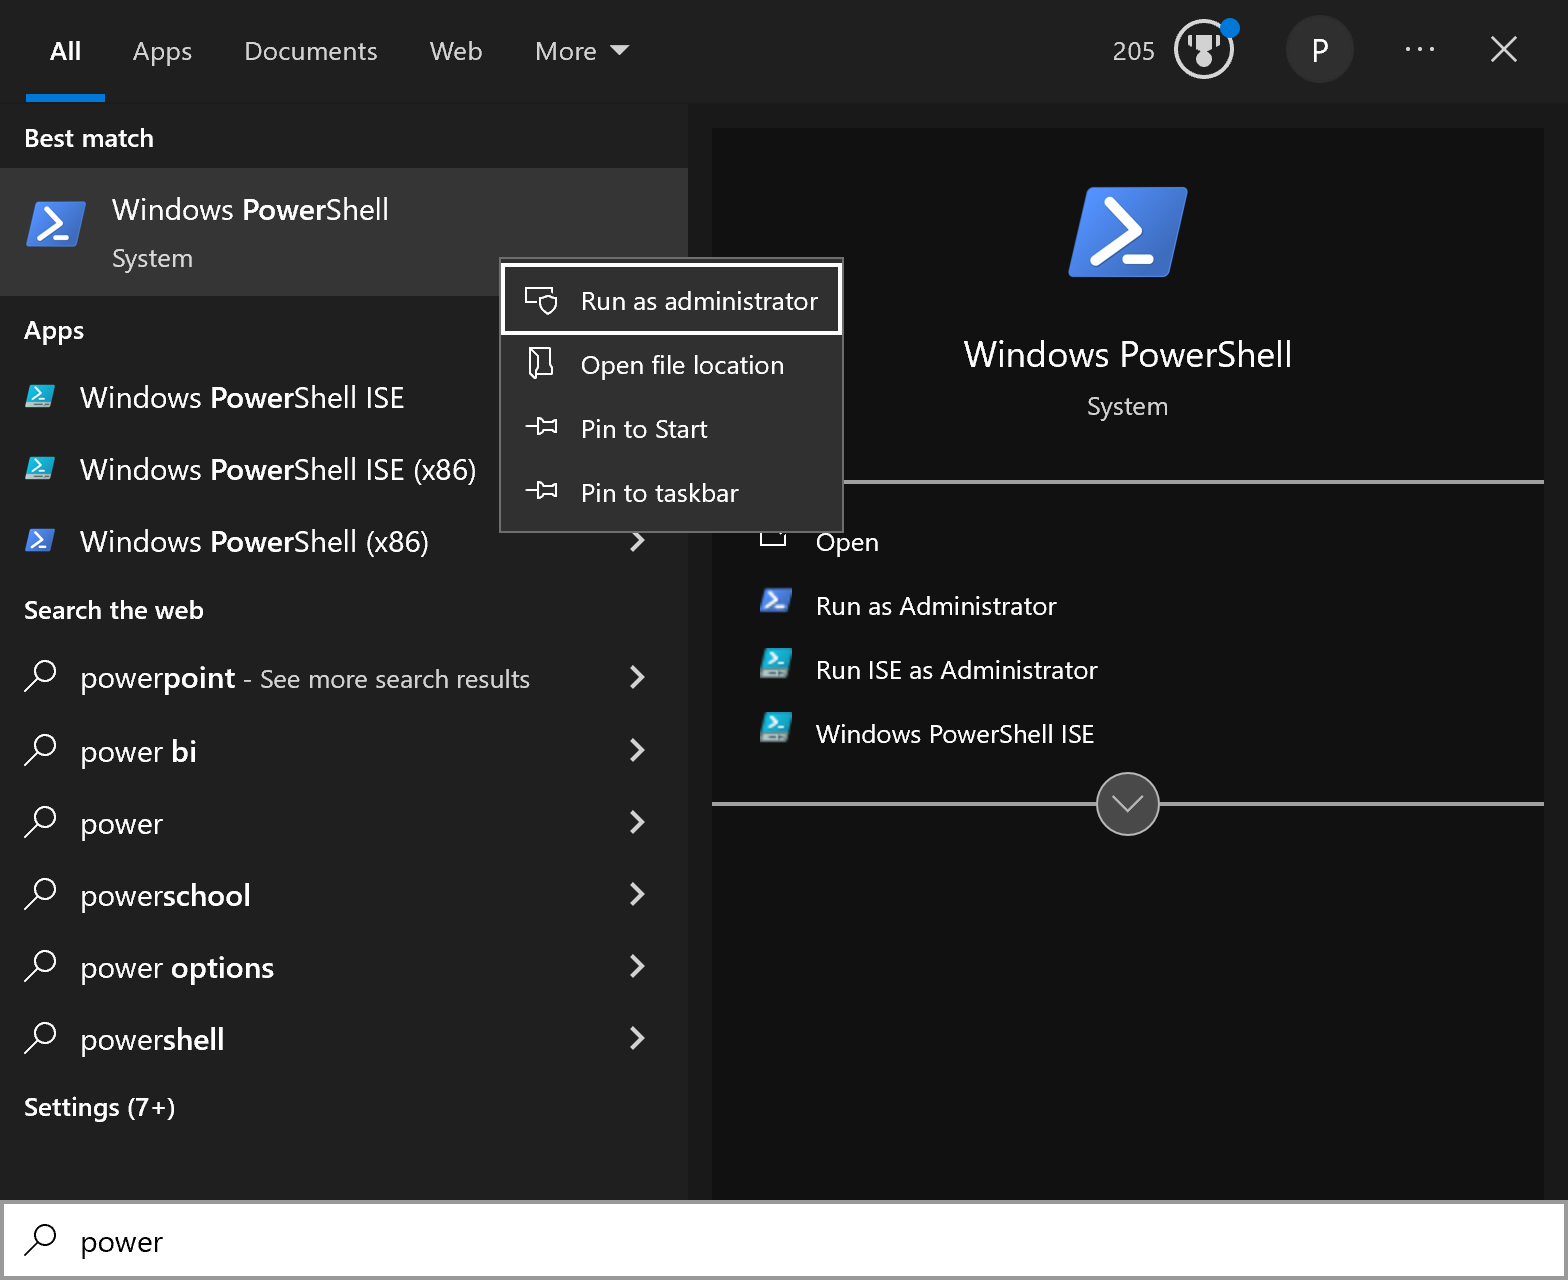
- Confirm the User Account Control prompt.
- Type
wsl --installinto the window and press enter.
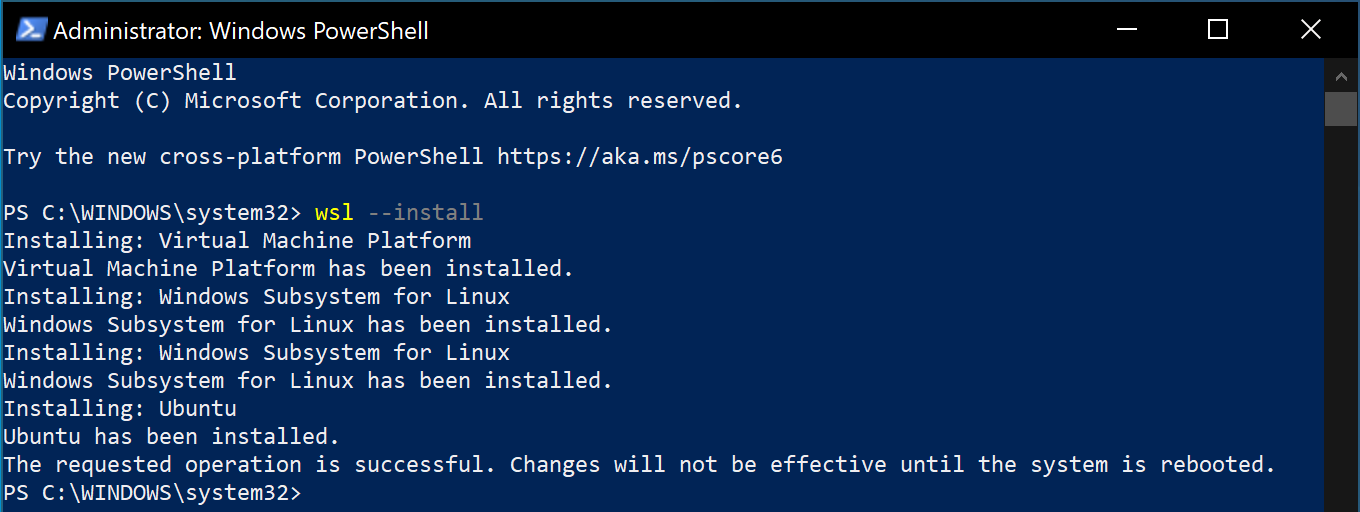
- After the installation completes, restart your computer.
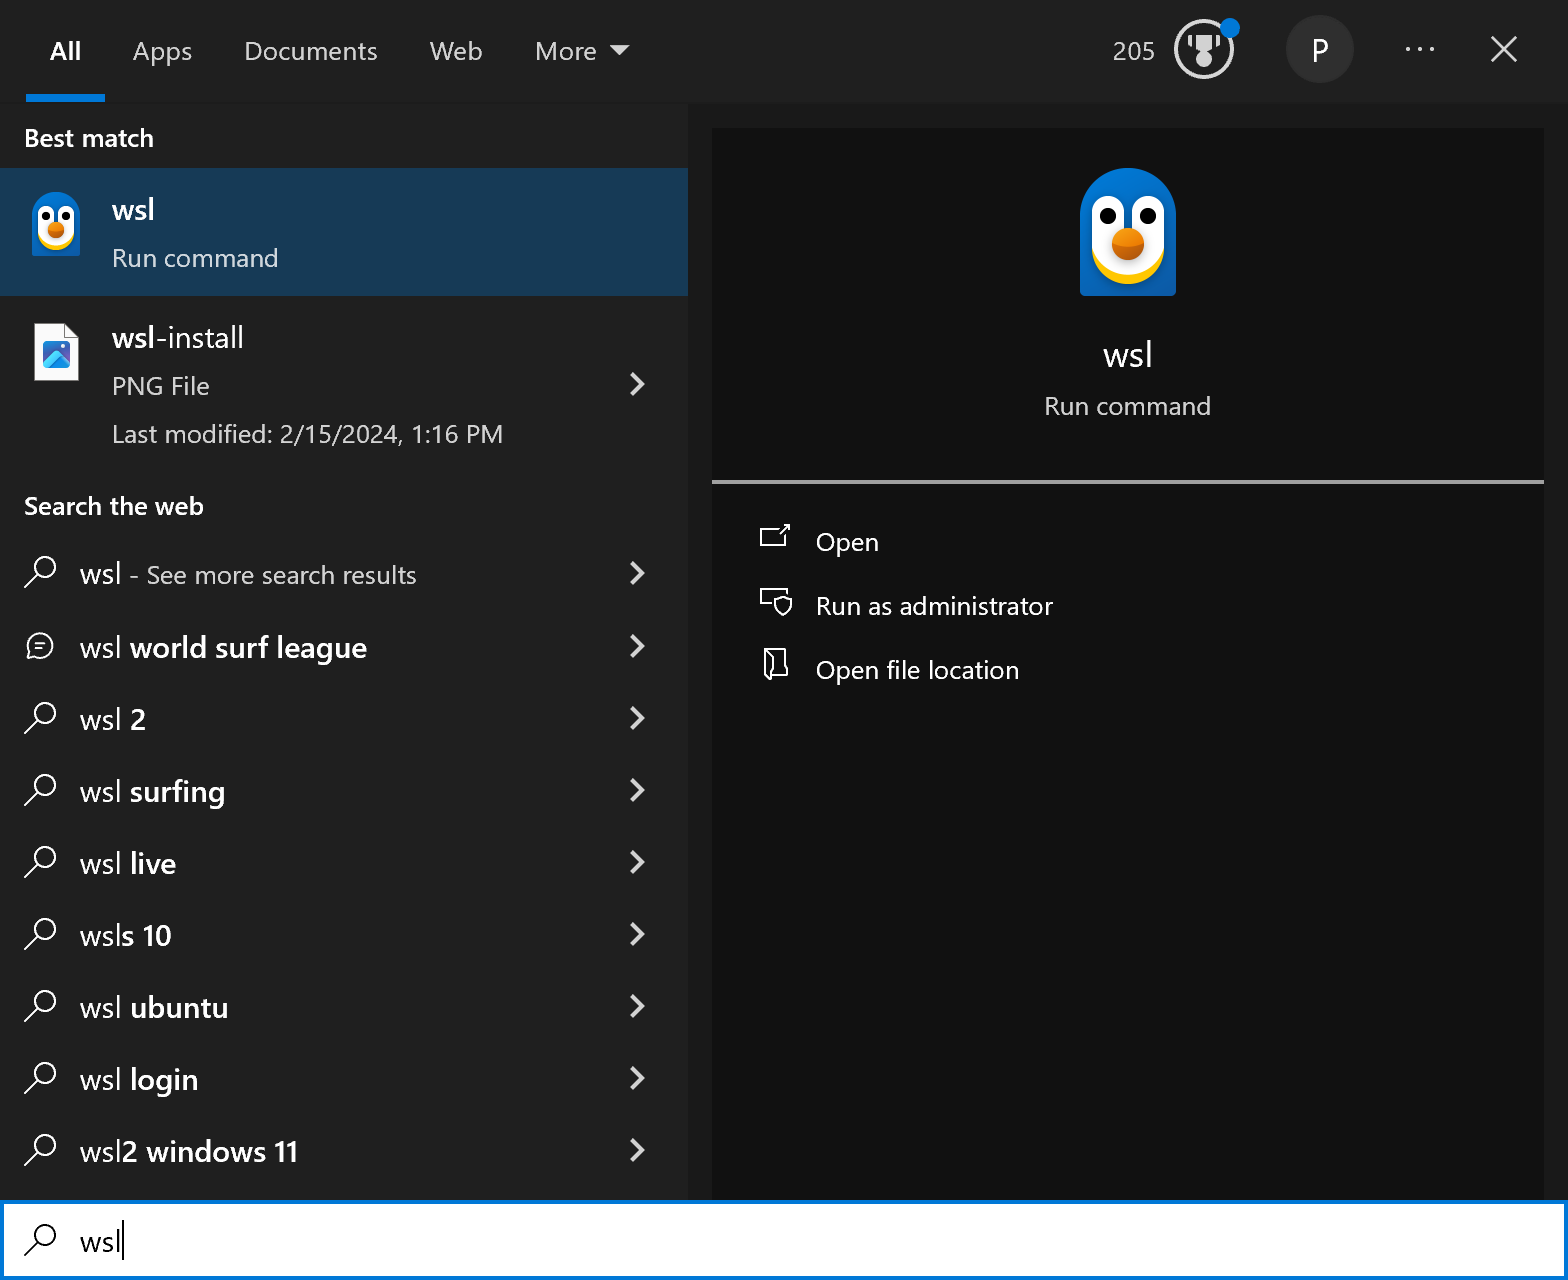
- After restarting, type "wsl" in the Start menu. It should bring up a penguin icon. Run this command.
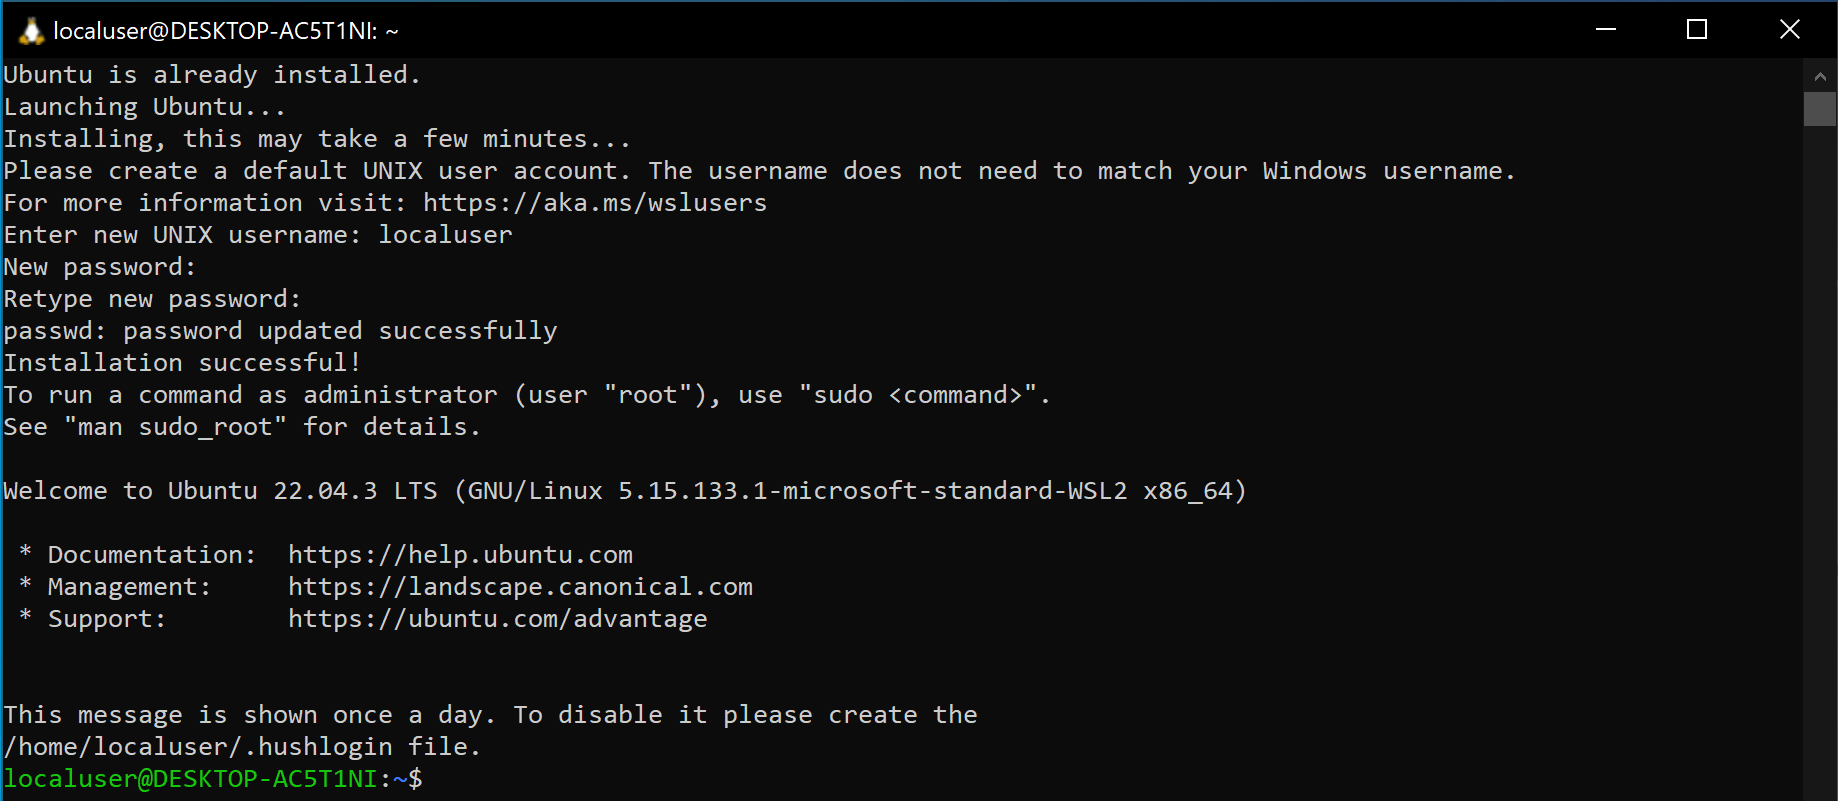
- A window should open, finishing the WSL installation. You will be prompted to
set a username and password for the Ubuntu installation. You can use any values
you wish. This tutorial will use the username
localuser.
- Restart your computer.
- After restarting, type "wsl" in the Start menu. It should bring up a penguin icon. Run this command.
- You can now "pin" the WSL icon on your toolbar to bring up an Ubuntu terminal. Use this terminal window in order to run commands in the rest of this guide.
For all Operating Systems
Install Docker Desktop. This program is a graphical method to manage and run Docker containers.
Install Visual Studio Code (VSCode). This is the preferred IDE for COSMOS development. This IDE can be extended by various extensions which make programming easier.
Extensions can be searched for and installed from the Extensions tab on the left navigation menu. Some recommended extensions for COSMOS development include:
- C/C++: Useful C/C++ features
- C/C++ Themes: Better C/C++ Syntax Highlighting
- Dev Containers: Allows VSCode to connect to Docker containers
- Doxygen Documentation Generator: Automatically generates Doxygen documentation templates
- Code Spell Checker: Checks spelling in comments and code
Step 2: Install Docker Container
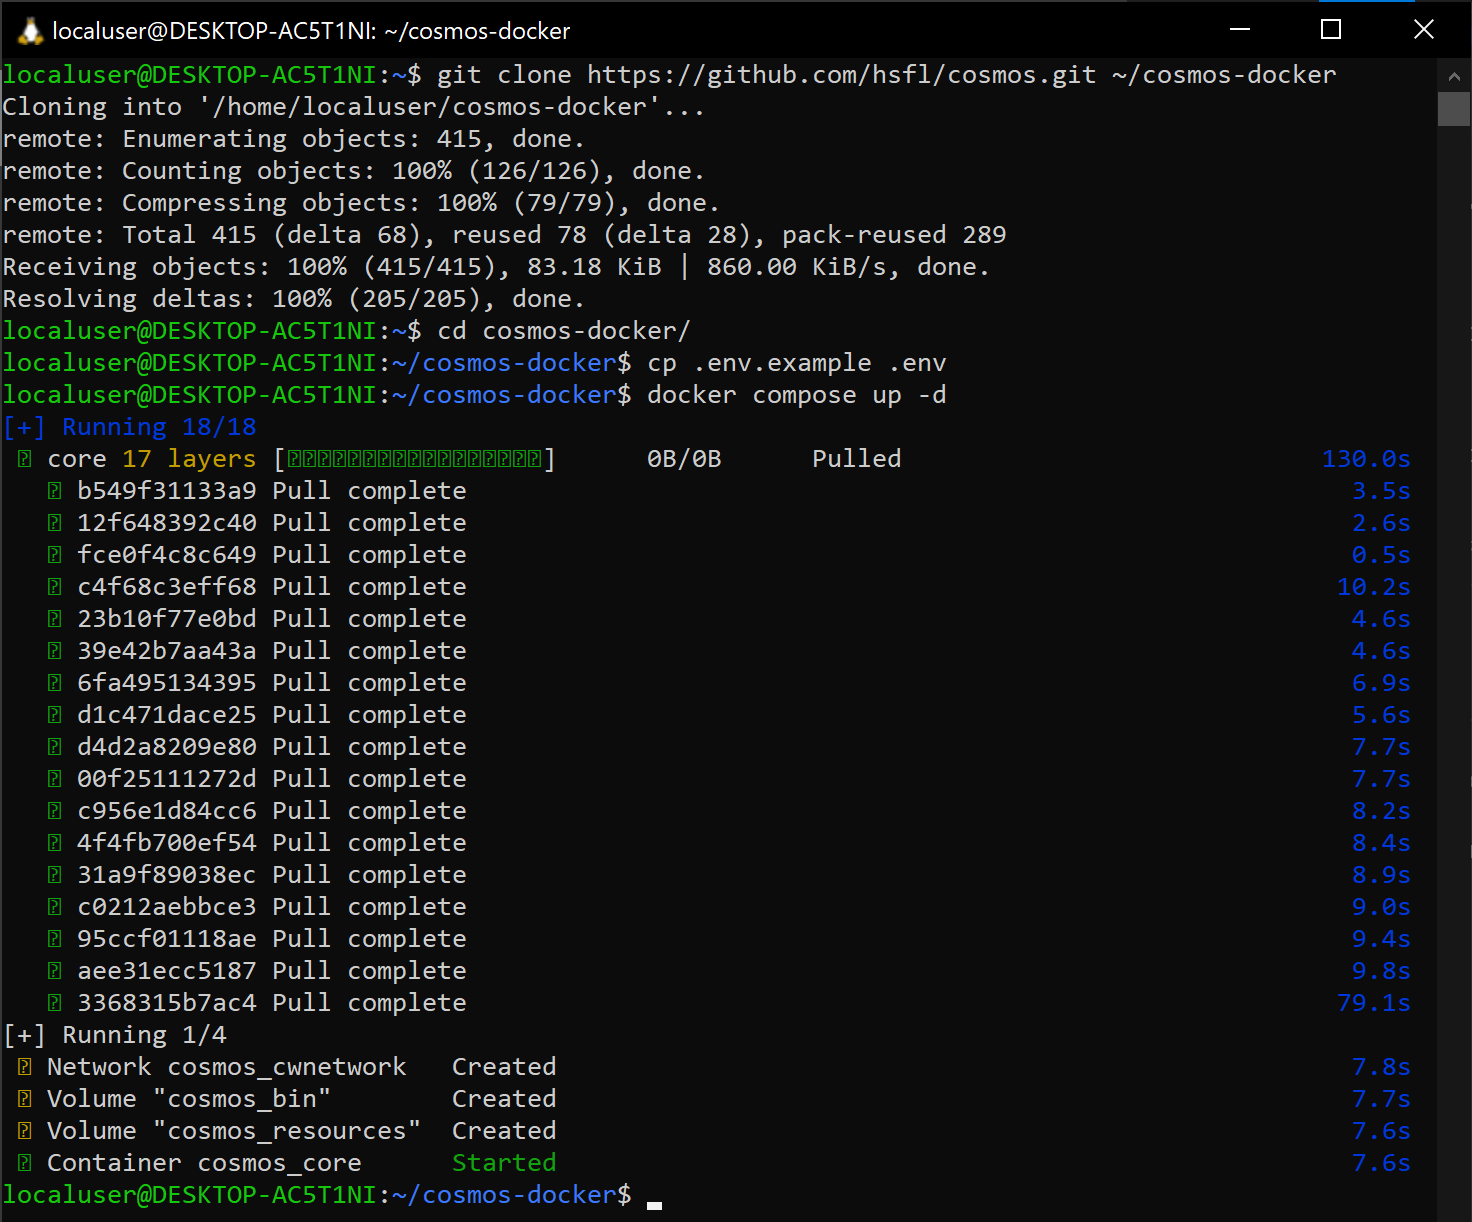
Next, clone the COSMOS repository to your local machine. Run the following command in your terminal:
git clone https://github.com/hsfl/cosmos.git ~/cosmos-docker
After it completes, change to the cosmos-docker directory:
cd ~/cosmos-docker
Copy the .env.example file to .env. You don't need to change its contents:
cp .env.example .env
Now start the Docker container:
docker compose up -d
At this point, the container, containing the COSMOS installation, is running.
You can verify that the container is running by opening Docker Desktop, or running the command
docker ps
Got permission denied while trying to connect to the Docker daemon..., this is because your user has not been added to the docker group. Run the following command to add the current user to the docker group:
sudo usermod -aG docker $USER
docker group by running the command
groups
Step 3: Connect to the container
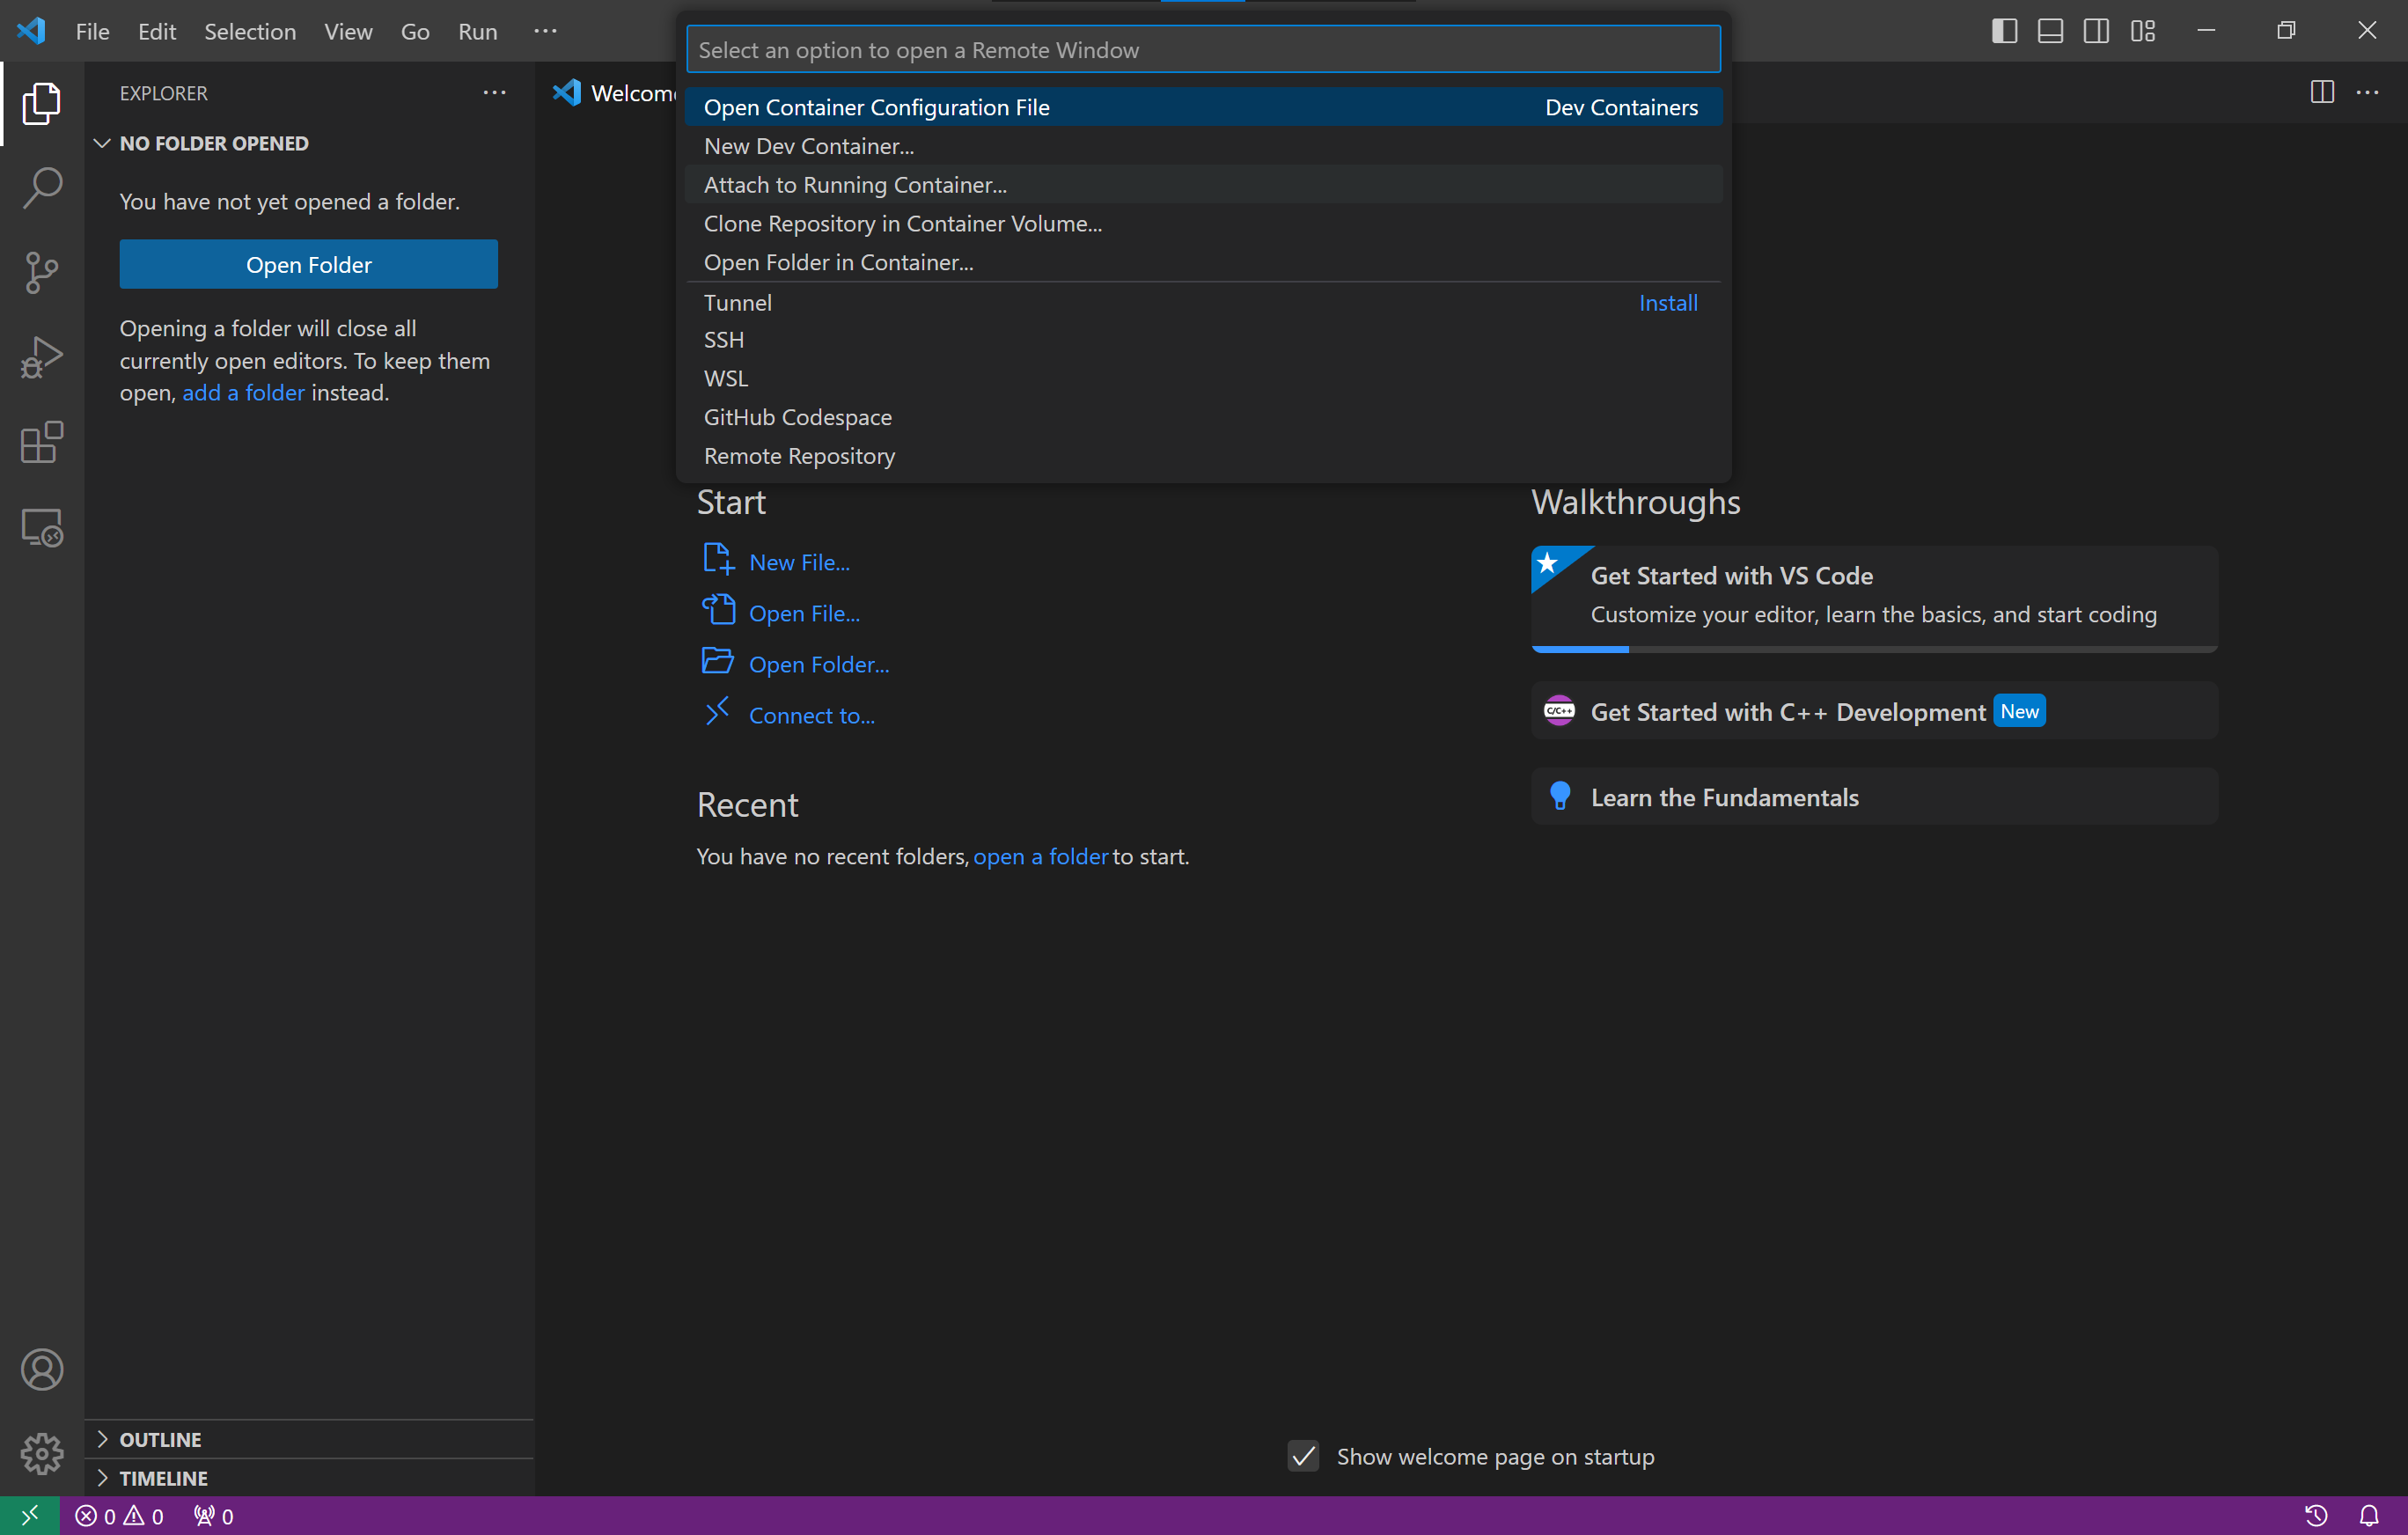
With the container running, you can connect to it using VSCode. This step assumes that you have the Dev Containers extension installed.
Press the "Attach" button (the green button) at the bottom left of the VSCode window. A dropdown will appear at the top center of the window. Select "Attach to Running Container..."
Select the /cosmos_core container. If this container is not visible, ensure that the container is running using docker ps or Docker Desktop.

When VSCode finishes connecting to the container, press the "Open Folder" button in the Files tab on the left navigation menu. It wil start in the /root/ directory. Select the cosmos directory, then press OK.
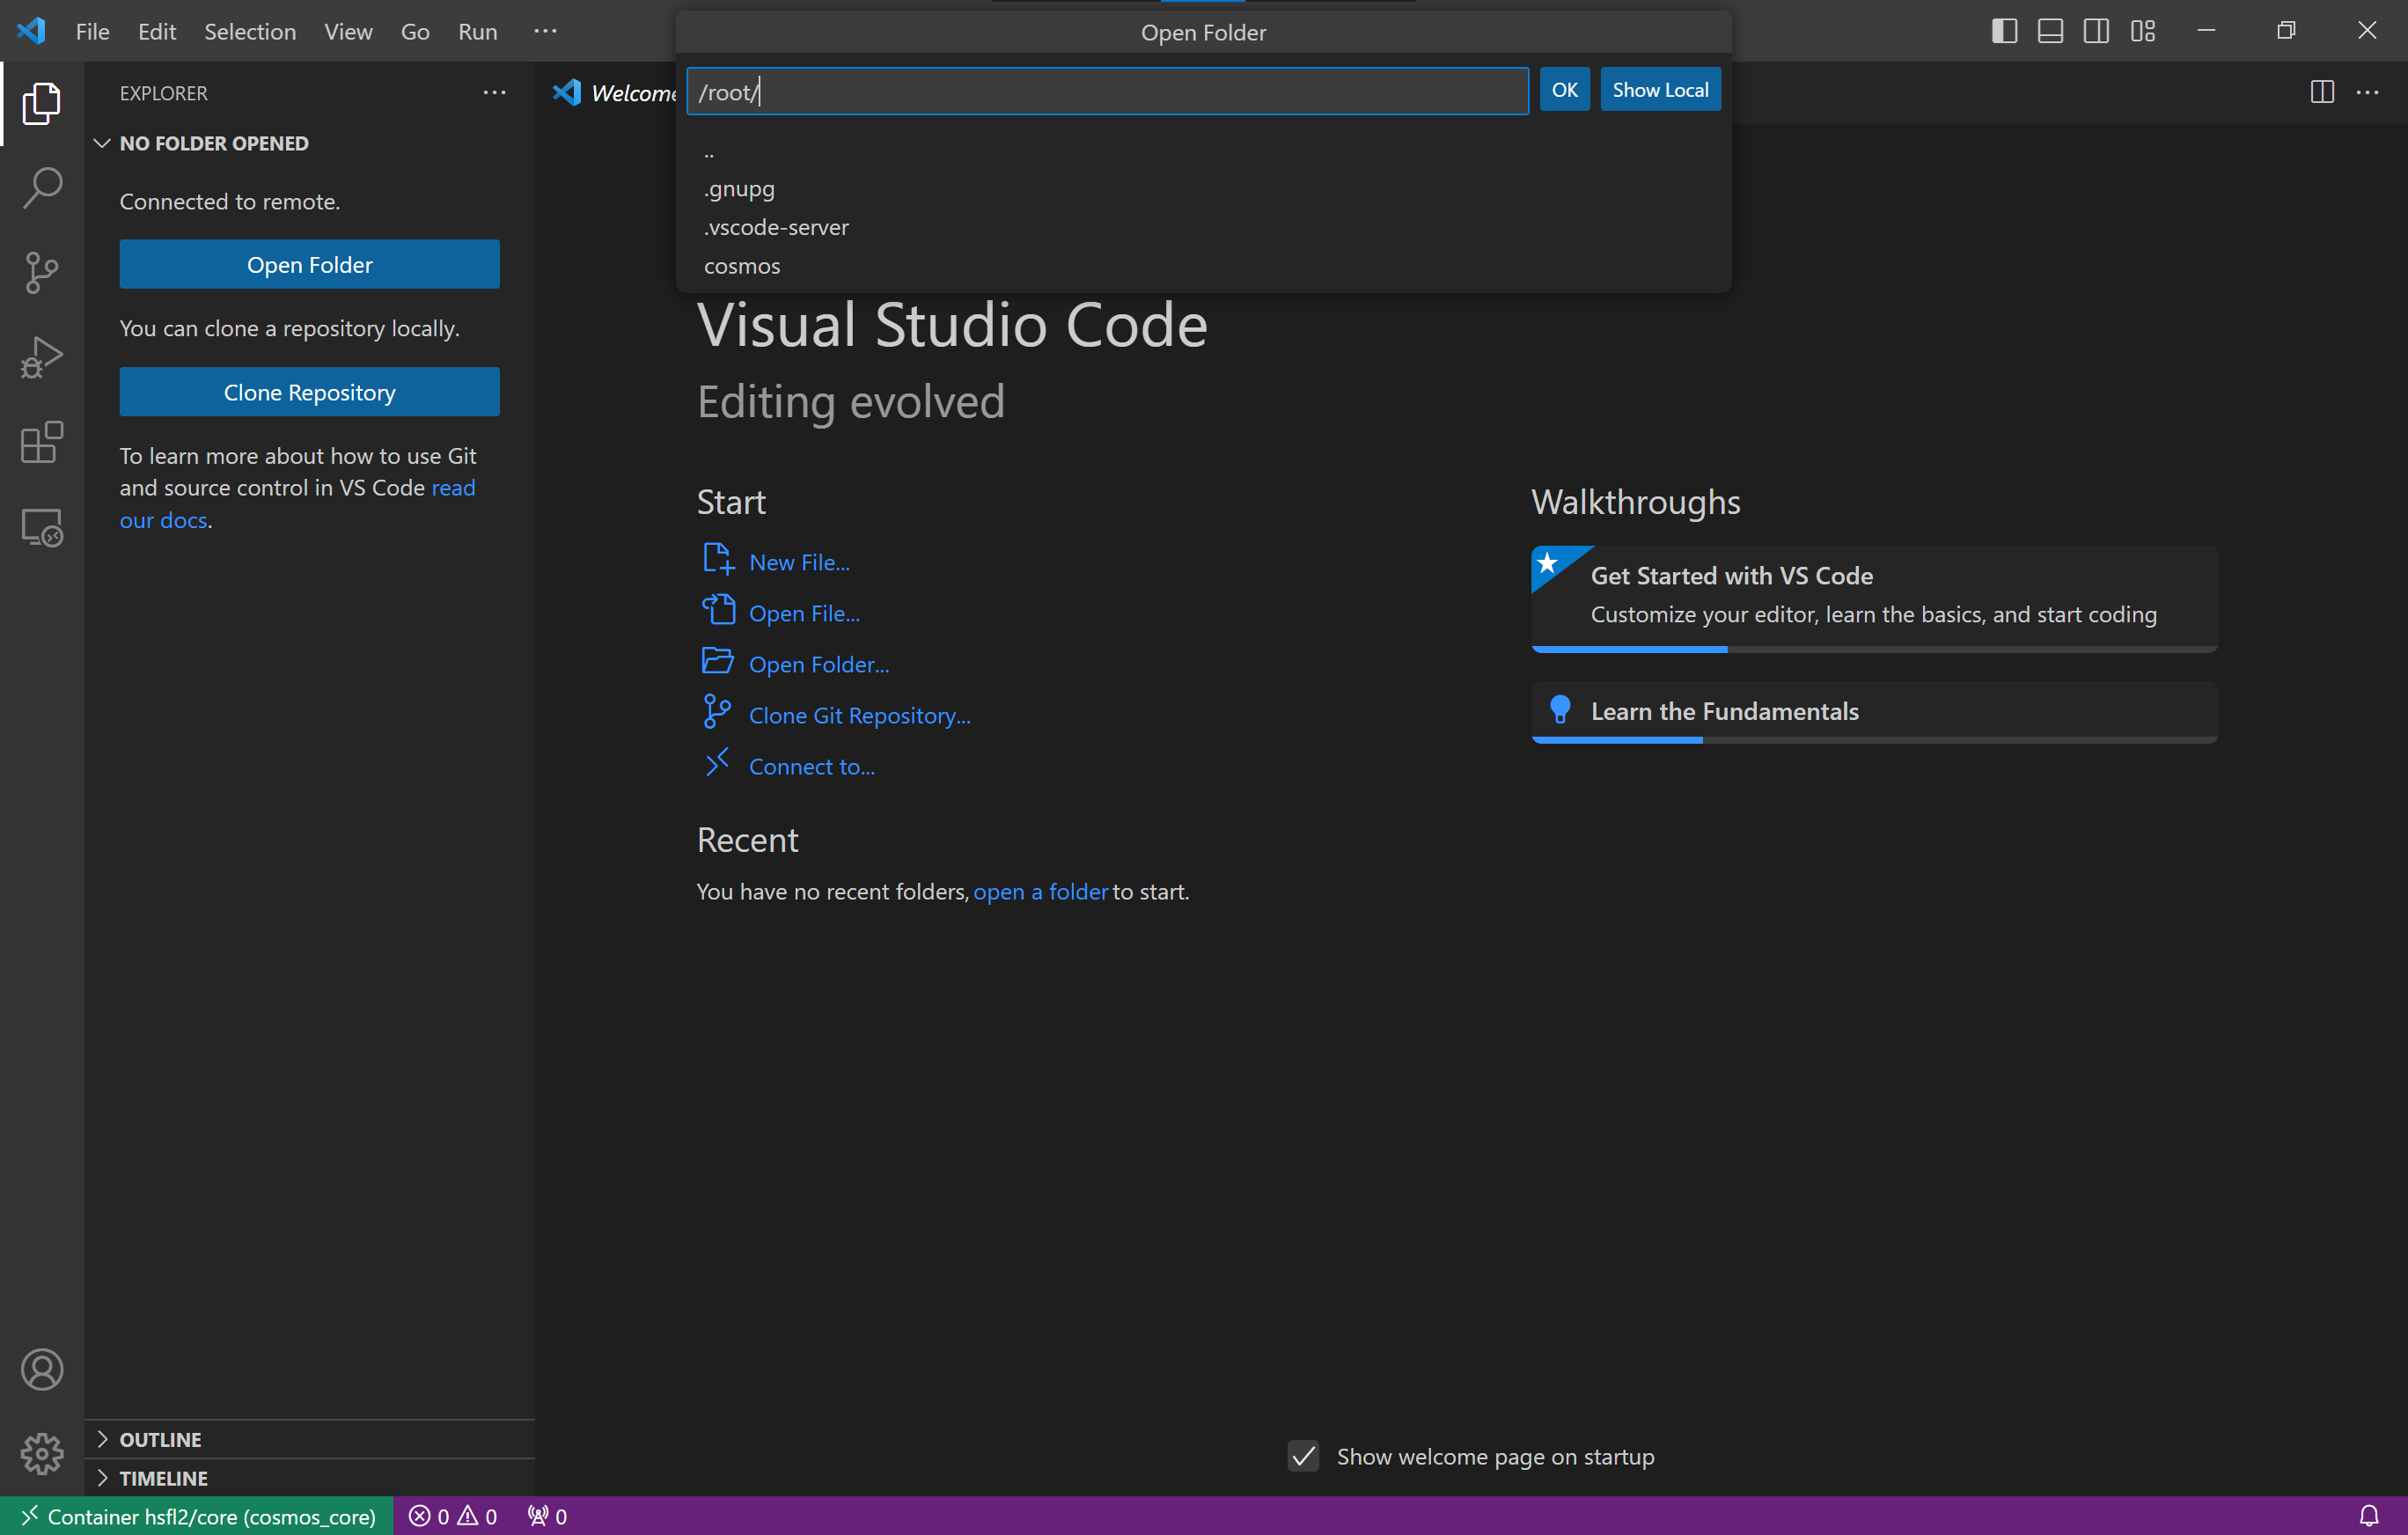
You will now be within the ~/cosmos/ directory.
Manual Installation
It is also possible to manually install and work with COSMOS on your computer.
Step 1: Install Prerequisites
For Windows Users
Install the Windows Subsystem for Linux using the same instructions as in the Docker section.
For all Operating Systems
Install Visual Studio Code using the same instructions as in the Docker section.
The Dev Containers extension is not necessary if you are not using Docker containers. However, the WSL extension is required if you are using Windows.
Step 2: Install COSMOS
Next, open a terminal, and enter the following commands:
sudo apt update        # Fetches the list of available updates
sudo apt upgrade       # Installs some updates; does not remove packages
Release file ... is not valid yet (invalid for another ...). Updates for this repository will not be applied.
when updating apt, this is because your Linux installation's date and time is
not accurate.
Run the
date command to show the time on your system. If the timezone is
incorrect, you can list possible timezones using
timedatectl list-timezones
sudo timedatectl set-timezone <new_timezone>
sudo date -s "YYYY-MM-DD HH:MM:SS"
date again. If it is
correct, you can try updating your apt packages again.
sudo apt-get install build-essential cmake          # Installs compilation tools
git clone https://github.com/hsfl/cosmos/ ~/cosmos  # Clones the COSMOS installation tools
cd ~/cosmos/install_scripts                         # Go to installation directory
chmod +x *                                          # Makes installation scripts executable
./cosmos-install                                    # Starts COSMOS installation
After COSMOS completes installation, ensure you have the most recent version of COSMOS submodules.
cd ~/cosmos
git submodule update --init --recursive   # Initialize the COSMOS submodules
got submodule update --remote --merge     # Ensure the submodules are up-to-date
Step 3: Open the COSMOS directory
With COSMOS set up, you can connect to it using VSCode.
For Windows Users
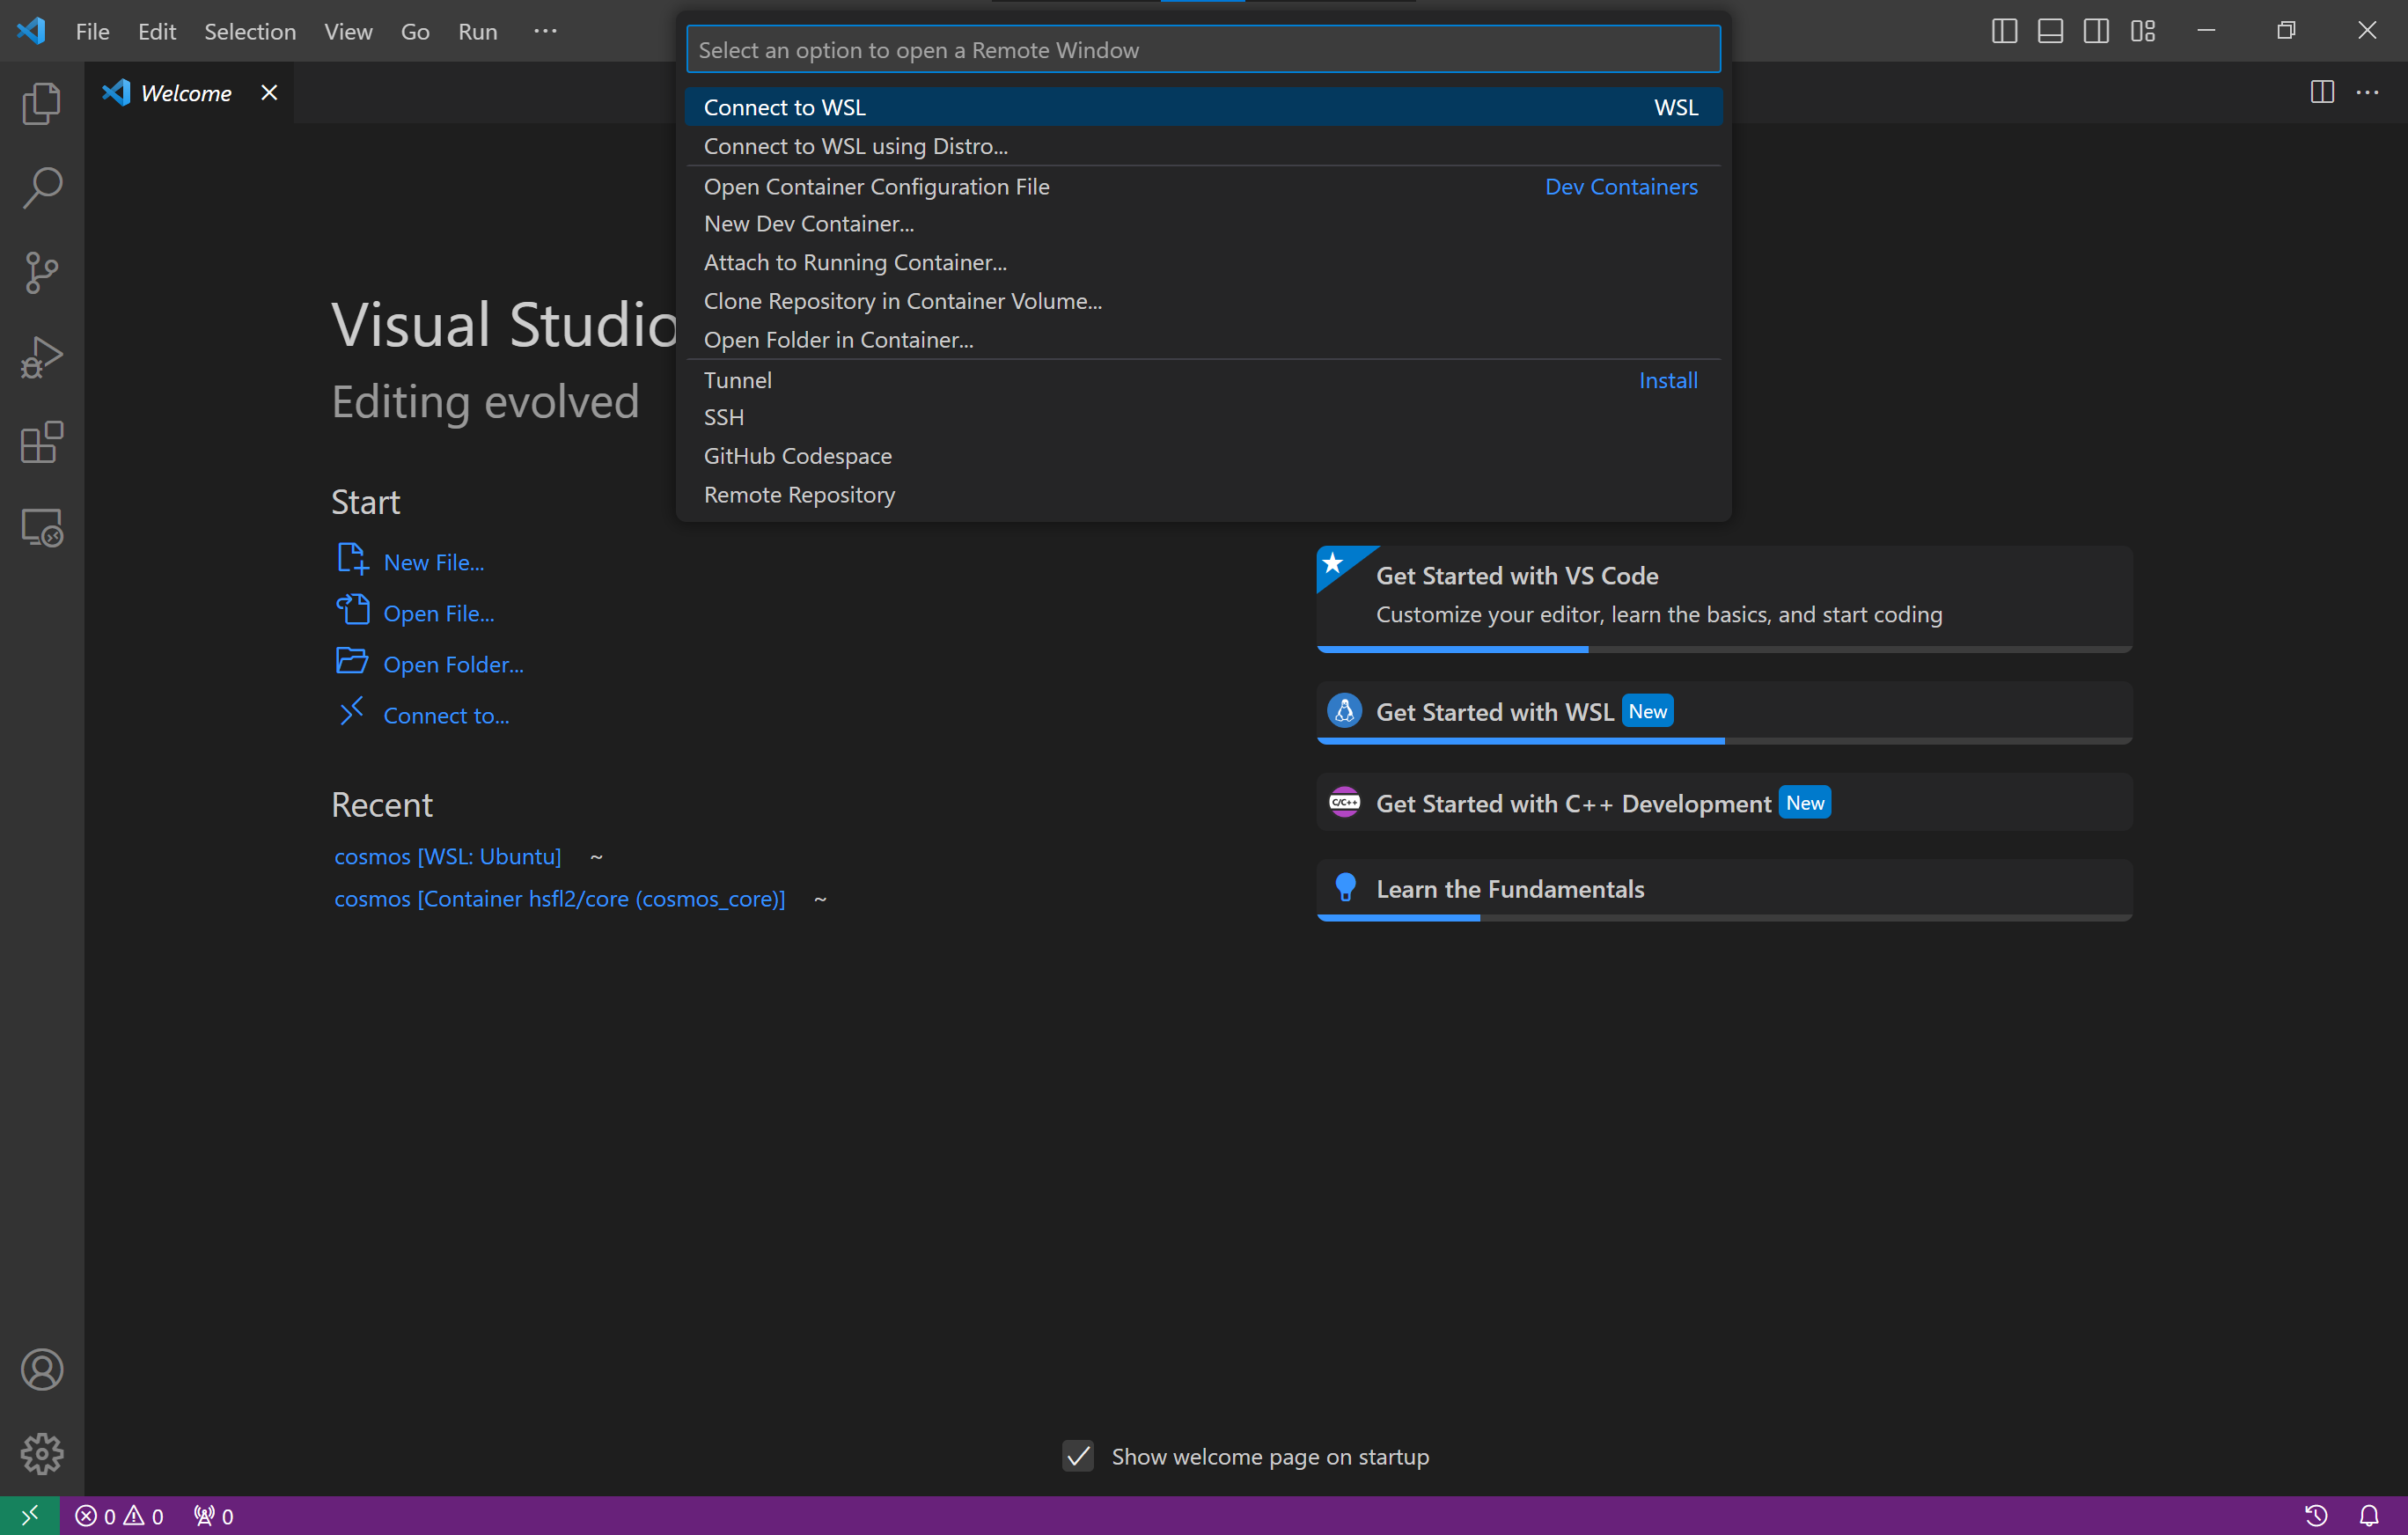
This step assumes that you have the WSL extension installed.
Press the "Attach" button (the green button) at the bottom left of the VSCode window. A dropdown will appear at the top center of the window. Select "Connect to WSL".
For all Operating Systems
On the File tab on the left navigation menu, select the blue "Open Folder" button, or select File > Open Folder...
Select the cosmos folder.
You will now be within the ~/cosmos/ directory.